
How to Solder: A Beginners Guide
Soldering can appear daunting to the beginner although the techniques are actually quite simple. In this tutorial we will explain what soldering is, give instructions on how to solder, and provide some helpful safety tips you should follow when soldering.
What is Soldering?
Soldering is the process of joining two metals together by melting solder, a metal wire with a low melting point. Soldering is commonly used in electronics, computer repair and when joining components permanently to a printed circuit board.
The two main types of components
There are two main types of components. Through-hole components (also known as leaded components - as in cables or wires, not the poisonous metal) are fitted through drilled holes in the printed circuit board. This makes them more physically secure and more suitable for switches, connectors, heavy components and anything else likely to bear heavy force. Surface-mount components (SMD) are simply placed upon copper pads (without holes) on one side of the board, which means they take up less board area than their through-hole equivalent. Surface-mount components also tend to be cheaper and there is an increasing shift towards using them as a way to reduce the unit costs of a product since they are easy to machine place.
Soldering Tools

Soldering Iron
The soldering iron is the primary tool when it comes to soldering as it provides the heat to melt the solder. For most electronic and printed circuit board work you should look for a soldering iron between 15W and 30W, anything higher and you risk damaging the component or the board.
You should also have a stand to place the soldering iron in when it is not being used for safety reasons and a sponge to clean to tip before use.
Types of Solder
It is important to choose the right type of solder as only a few are suitable for electronics work. There are two types of solder; lead-based solder and lead-free solder. Lead-based solder was mostly used in the past and was made of a mixture of tin and lead. Due to health concerns over the use of lead-based solder the industry is moving towards using lead-free solder and it is required by the EU that commercially available electronics use lead-free solder.
The core inside the solder wire contains flux which is designed to improve electrical contact and mechanical strength in solder joints. Different types of flux are used in different industries. Acid core flux is used for plumbing and rosin core is used for electronics so for PCBs and electronics always use rosin core.
How to use a soldering Iron
Clean the tip
The first step is to clean the tip of the soldering iron to remove any old solder. Plug the iron in, turn it on and wait a few minutes for it to heat up. Soak the sponge with water and squeeze it out. Once the soldering iron is heated, place the tip onto the sponge, wipe both sides of the tip and if it is hot enough it should steam. If the sponge is too dry add more water.
Tin the tip
Before using a soldering iron the tip must be tinned. To tin a soldering tip first warm up the soldering iron then cover the tip with a thin coat of solder. This improves heat transfer between the tip and the component you are soldering, makes soldering quicker and easier and helps to keep the soldering iron in good condition. It is good practice to always tin your soldering iron tip before and after soldering.
Soldering Instructions
- Hold the soldering iron in your dominant hand and hold a piece of solder wire in your other hand.
- Place the tip of the soldering iron to both the pad and the lead of the part that you want to solder.
- Add 1mm – 3mm of solder under the tip and once it melts pull the solder away.
- Keep the tip of the soldering iron on the pad and lead for another second.
- Put the soldering iron back in its stand when you have finished using it.
- If the connection is good the solder completely covers the pad and surrounds the lead.
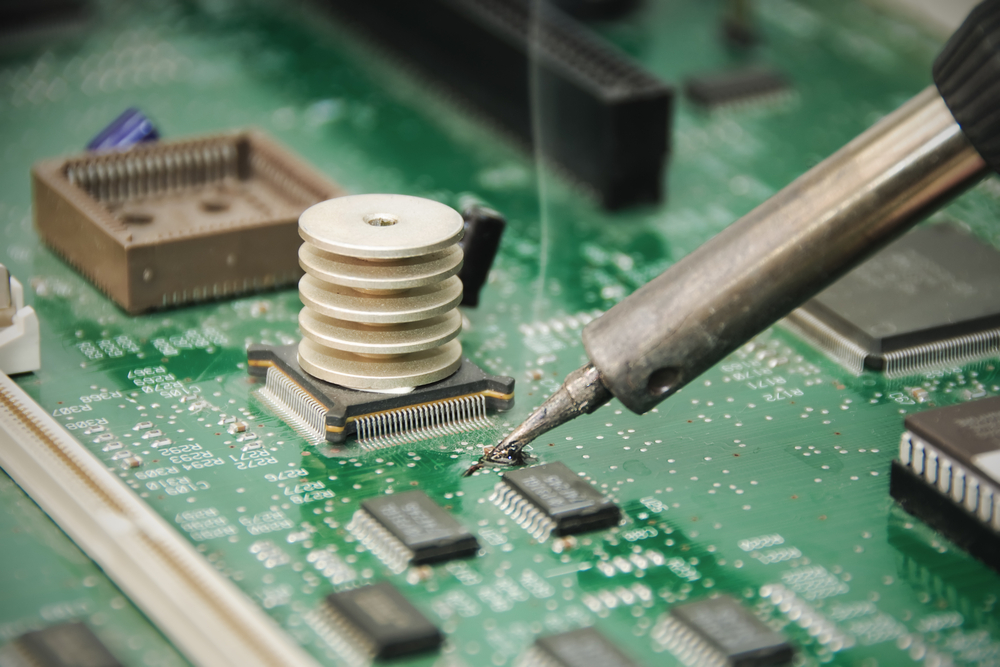
Below we show the process of soldering step-by-step:
Pre-tin the first pad and align the SOIC component. Solder the first pad, and once secure, solder the opposite corner pad to lock the component, and then solder the rest of the leads.
Fit pre-bent resistor leads through the PCB and solder leads both ends keeping the resistor flat to the PCB, and tack solder both ends. Cut the excess lead and final solder both ends
Fit component with correct orientation and tack solder opposite ends of the IC to fix in position. Check that IC is flat to the PCB and re-work if necessary. Once secure, solder the rest of the pins.
Line the QFP with pads and tack solder at opposite corners, whilst maintaining gentle pressure on the QFP with a finger to hold it in place.
If the fit is not satisfactory, break the tack solder joint by briefly applying heat and gently lifting the component with tweezers. Realign the component and tack solder at the corners again.
Place the QFP, flux the pads, and gently draw a solder bead down the line of fingers. Tease any shorts out along the length of the fingers, fluxing again at each attempt. Do not apply heat continuously.
Soldering Safety Tips

- Always wear safety goggles if soldering.
- Avoid touching the tip or any metal part of the soldering iron.
- Use a soldering iron with the right wattage as if there is too much heat this can damage the PCB or components.
- Wait a few minutes before touching a soldered surface to allow it to cool.
- To avoid the risk of fire never put a hot soldering iron on to a work surface. Always return the soldering iron to its stand.
- Always unplug the soldering iron when you are not using it.
- Use lead-free solder wherever possible.
- Wash hands thoroughly after soldering.
- Work in a well ventilated area, use a fume extractor and avoid inhaling fumes.
Soldering Tips
- When purchasing a soldering iron and solder, aim for a small tip and thin solder.
- Try to solder quickly so that components don’t stay hot for too long.
- Try and find someone who is experienced in soldering to check your work to ensure you are doing it correctly. This can save you a lot of time in the future.
- Do not finger-mark solder pads on the PCB or component leads as this may prevent solder wetting.
- Application of flux will assist solder wetting if the solder surfaces are contaminated or for re-work.
- Always unplug the soldering iron after you have finished using it to prevent the tip from burning and oxidising.
By following the tips and techniques in this guide you will be well on your way to mastering the basics of soldering. Soldering is quite simple to learn and with regular practice you will quickly make improvements.